Getting Started
Signing up is quick and easy. We'll walk you through the steps in this visual guide.
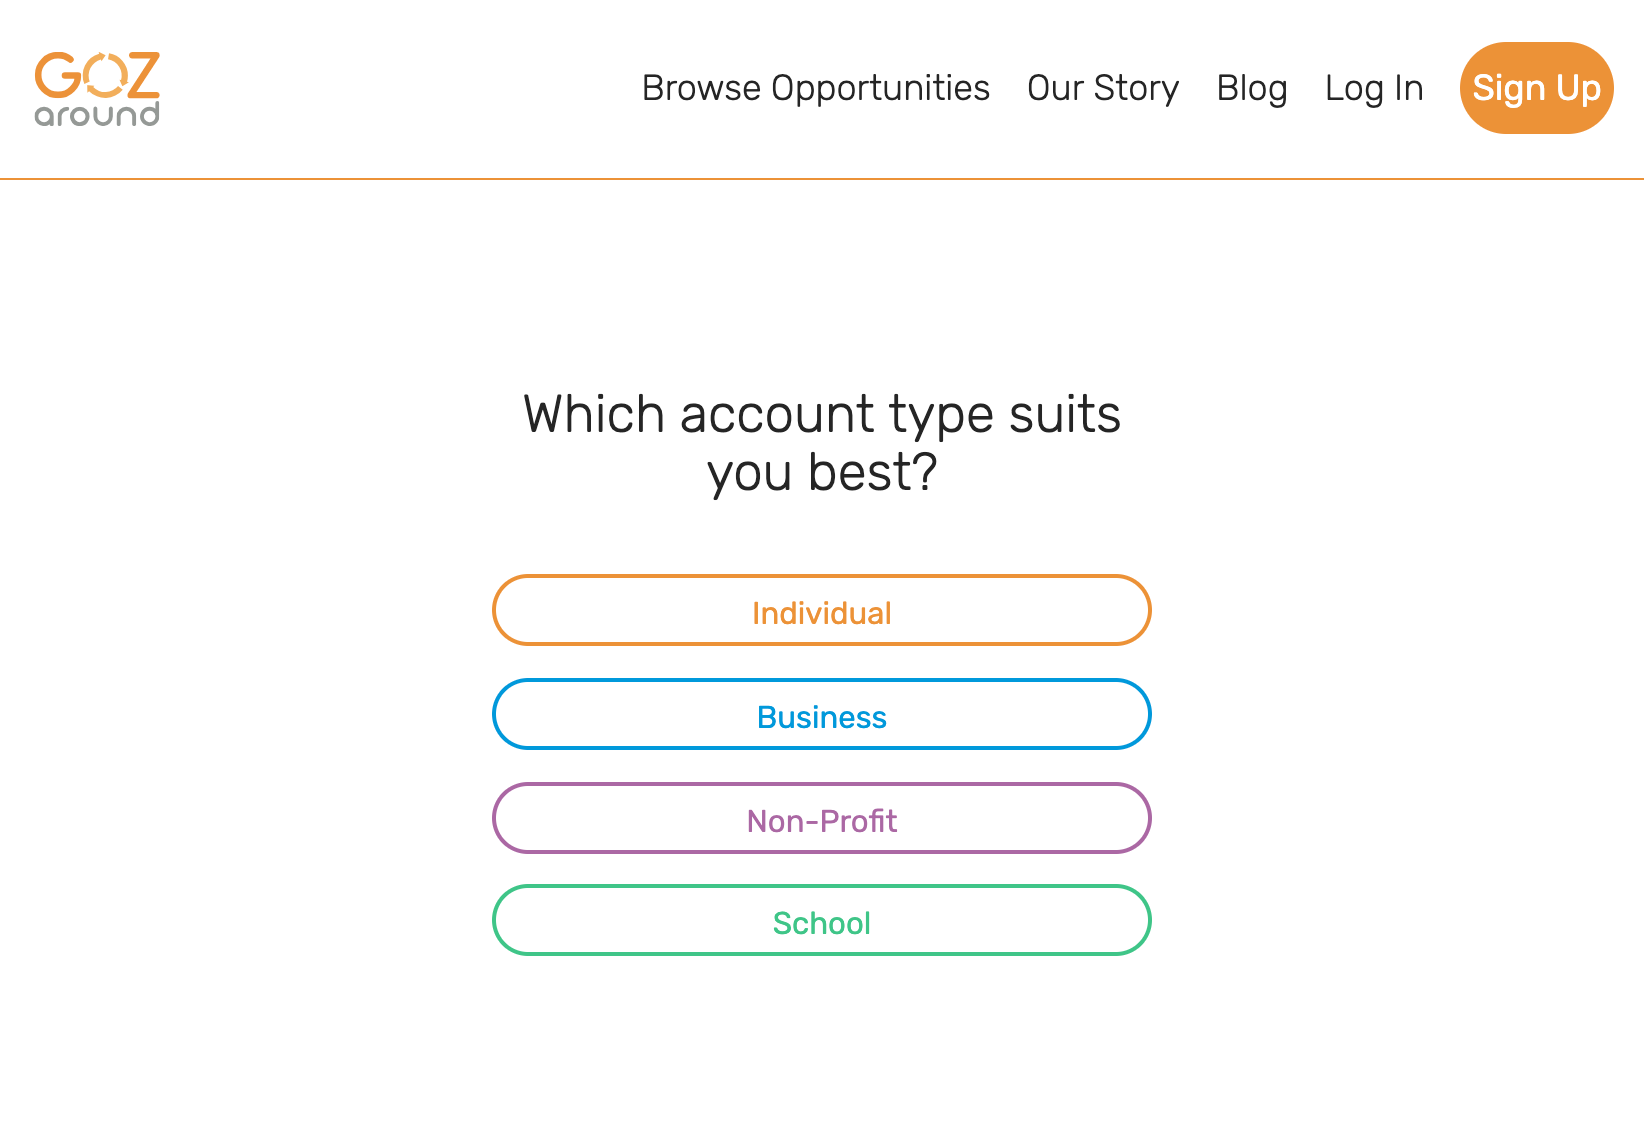
First, navigate to the sign up page by clicking the Sign Up button on any page.
Select an account type and follow the steps to create your account.
You'll be greeted with this welcome page if successful. At this point, expect to receive an email confirming your registration. Depending on your account type and the options you selected, you'll also need to wait for your employer or school to verify you as an employee before you can start recording contributions in the name your employer.
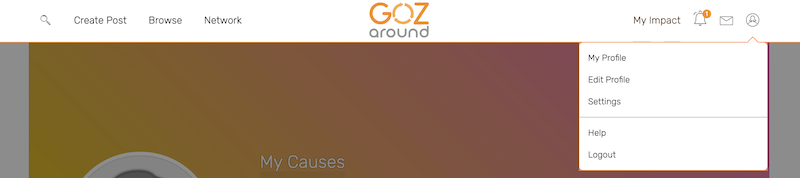
Your Profile
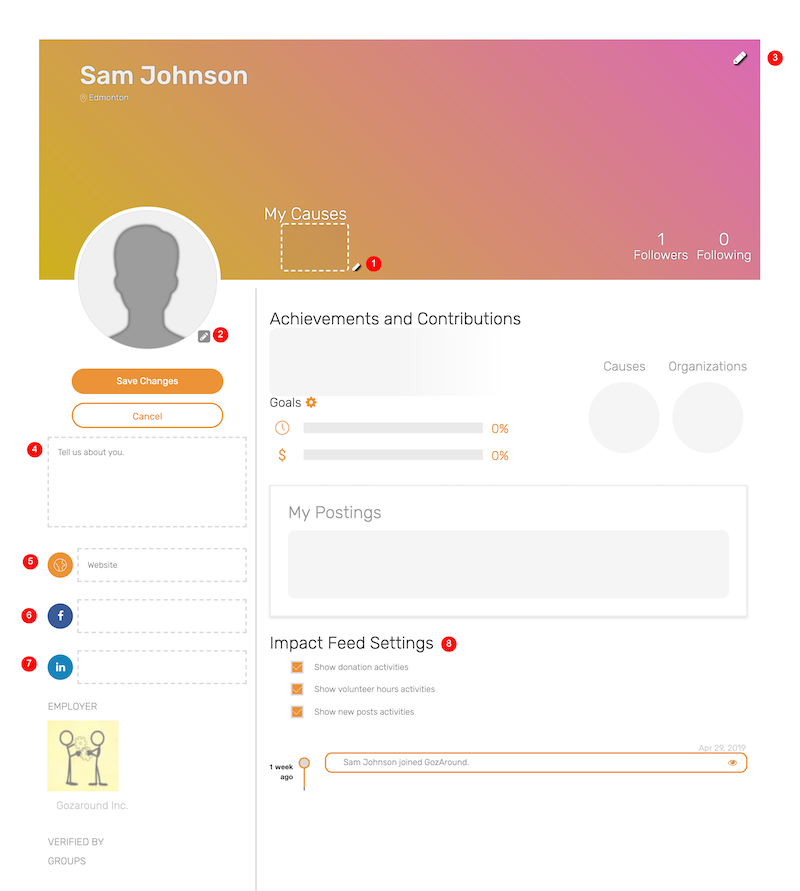
Change your cover image, profile image, or causes supported. Elements that can be changed will darken as you hover over them.
Along the left side you can edit your personal description or change your social media links.
In the main secion, your Impact Feed shows a history of your contributions, new posts, and posts that you share. You can change what others see when they view your profile.
Impact: Dashboard
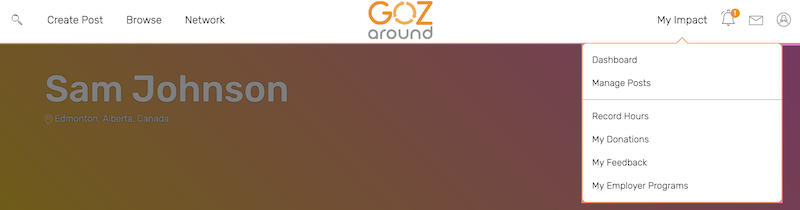
Clicking the logo in the navigation menu will bring you to your dashboard. You can also arrive to this page via the Dashboard link under the Impact menu.

The dashboard is a centralized location for reading up on news or new GozAround posts surrounding your favourite causes. Check your dashboard frequently for new content and stay informed!
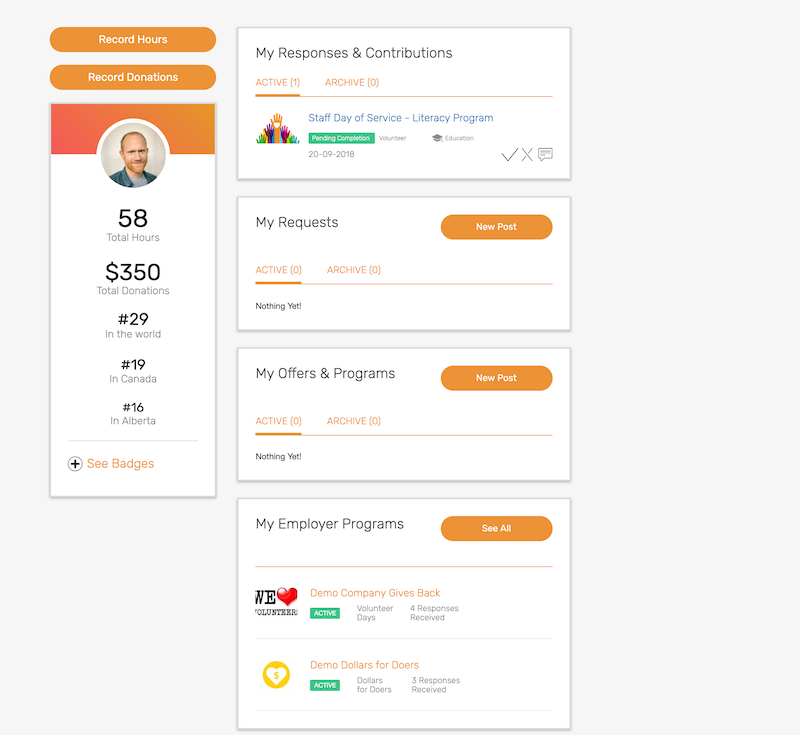
You can also find some quick links on the left side to record hours, donations, and manage your posts.
Impact: Hours & Donations
In this section we'll show you the basics of recording your contributions. Use the quick links on the dashboard or navigate Record Hours under the Impact menu and go to
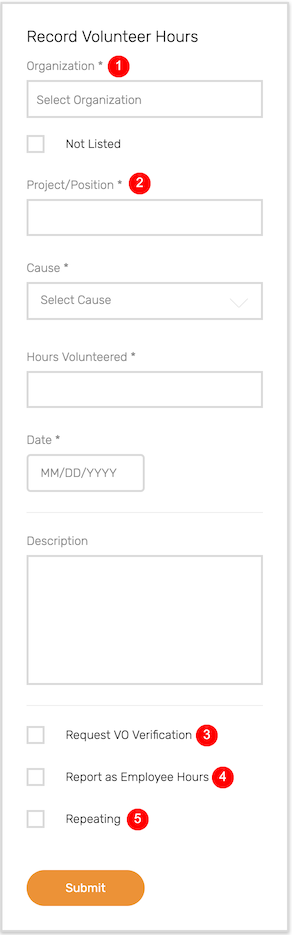
Let's go over some of the more notable fields on the hours form.
- Organization: The non-profit group or organization that you volunteered for.
- Project/Position: A name or description of the project, or volunteer position that you held during your contribution.
- Request VO Verification: Check this box if you require your hours to be verified by the Organization you volunteered for.
- Report as Employee Hours: If your account is linked to your employer, you may want to record these hours in association with your employer. Checking this box will allow you to include office and employee details. When your employer approves them, your hours will be included in company totals and reports.
- Repeating: Schedule repeats of this volunteer contribution. If you're set to receive notifications, you'll be notified of upcoming repeating hours that require confirmation.
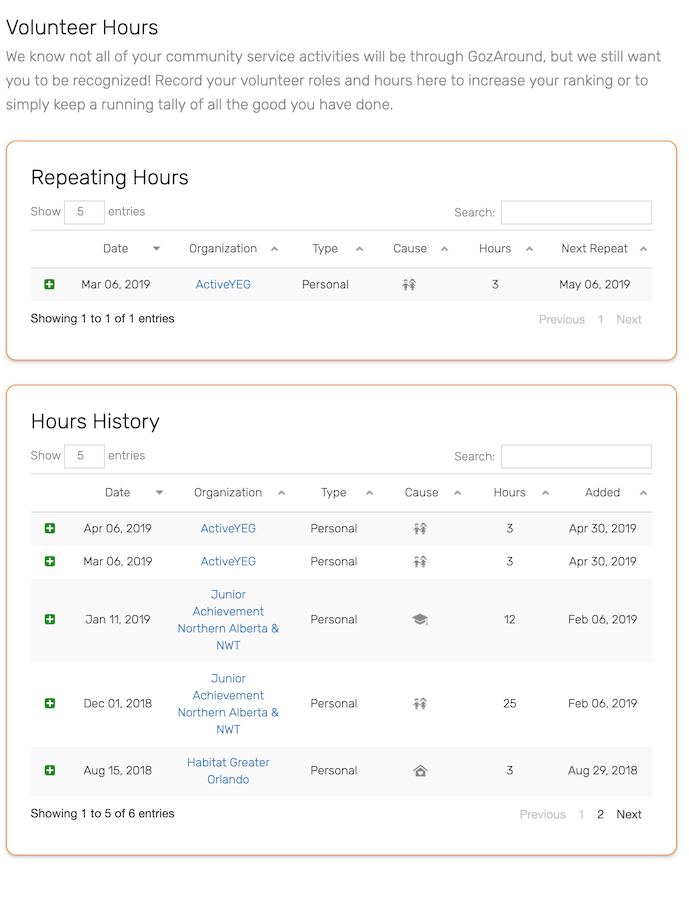
In the main section of this page is the history of your hours displayed in table format. Personal hours can be edited or removed as needed. Expand each entry to see extra details such as office, department, project details.
Looking for hours recorded for a specific organization or cause? Each table can be filtered responsively by the Search bar above by any text that matches in the table. Enter dates in the same format to filter by date.
Browsing Postings
Are you interested in volunteering opportunities? Head over to the Browse page via the navigation menu.

This is a listing of all posts available to you. Posts can be sorted by proximity to your current location (Closest First), when they were created (Latest First), posts approaching their deadline (Soonest First), or alphabetically (Title)
Additional filters can be applied under the "ADVANCED SEARCH OPTIONS" to find posts that are right for you, such as intended date and location, categories/causes, or from your employer only.
Select a post to view details such as description, date, and location.
If you're interested in responding to this post, select at the top of the post.
You'll be taken to a page where you can introduce yourself and your availability. As an employee you can offer help as a team of volunteers from your employer. Once submitted, the post owner should contact you and let you know if they've accepted your response.
Managing Posts and Responses
The dashboard quick link or Impact menu will lead you to the post management console.
Your post management view shows a collection of your responses to opportunites, and posts by you. As an employee you also can keep track of employer programs you're involved in. Your employer's programs can be found under the Impact menu.
Once your response has been accepted by the post owner, it's time to go out and do some good. Once you're done, come back to GozAround and mark your request complete using the quick actions on the Manage Posts page or by visiting the post itself.
You'll be asked to provide your hours volunteered if the post owner hasn't already. As an employee you can also mark these hours as employee hours.
After everything is completed and confirmed, these hours will automatically be added to your totals and hours history.